How to Receive and Replay External Webhooks in Netlify Functions with Hookdeck
Webhooks play a crucial role in modern application development, as they enable real-time communication and data transfer between different systems. For serverless applications hosted on the Netlify platform, efficient handling of webhooks becomes essential.
Hookdeck is a webhook management platform that helps developers reliably receive webhooks, manage events and troubleshoot any issues quickly. By integrating Hookdeck with Netlify, you can enhance the management and reliability of your webhook events, ensuring seamless integration with external systems.
In this article, we will explore how to receive and replay external webhooks in Netlify Functions using Hookdeck.
Create a Netlify webhook function
Before we can start receiving webhooks, we need to set up a Netlify serverless function to handle incoming webhook events. Netlify provides an excellent platform for deploying serverless functions in a scalable and efficient manner.
This example assumes you have a Netlify account; it demonstrates how to create a Netlify serverless function with Node.js.
To create a Netlify webhook function:
- Install the Netlify CLI by running the following command in your terminal:
npm install -g netlify-cli
- Create a
netlify/functionsfolder in the root of your project directory. - Inside the folder, create a
webhook.jsfile with the following code snippet as the content:
exports.handler = async (event) => {
  try {
    if (event.httpMethod !== "POST") {
      return {
        statusCode: 405,
        body: JSON.stringify({ error: "Method Not Allowed" }),
      };
    }

    // Process the webhook payload
    const payload = JSON.parse(event.body);

    // Do something with the payload
    console.log("Webhook received:", payload);

    // Return a response (optional)
    return {
      statusCode: 200,
      body: JSON.stringify({ message: "Webhook received successfully!" }),
    };
  } catch (error) {
    console.error("Webhook error:", error);
    return {
      statusCode: 500,
      body: JSON.stringify({
        error: "An error occurred while processing the webhook.",
      }),
    };
  }
};
- In your terminal, navigate to your project's directory and run the command below to deploy your project to Netlify. Follow the prompts to configure your deployment, including authorizing and setting up the deployment configuration.
netlify deploy
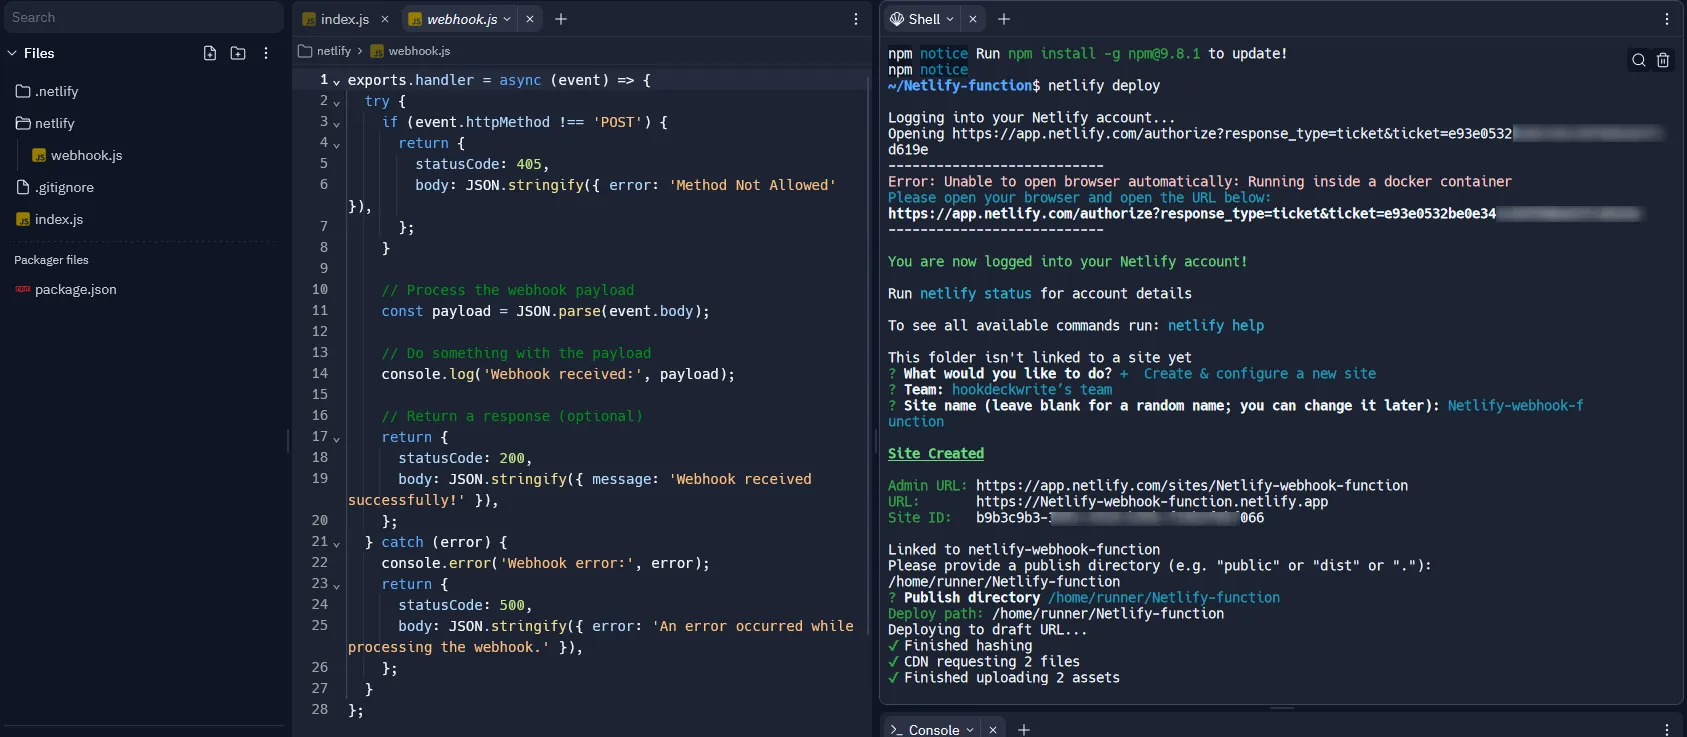
- The site gets deployed with the function, and Netlify provides you with a draft URL for the deployment.
The draft deployment of the site can be used for testing before deploying to production.
- Deploy the site to production by running the command:
netlify deploy --prod
Note the site URL provided as it will be needed later.
On your Netlify site dashboard, switch to the Functions tab and see the webhook function just deployed.
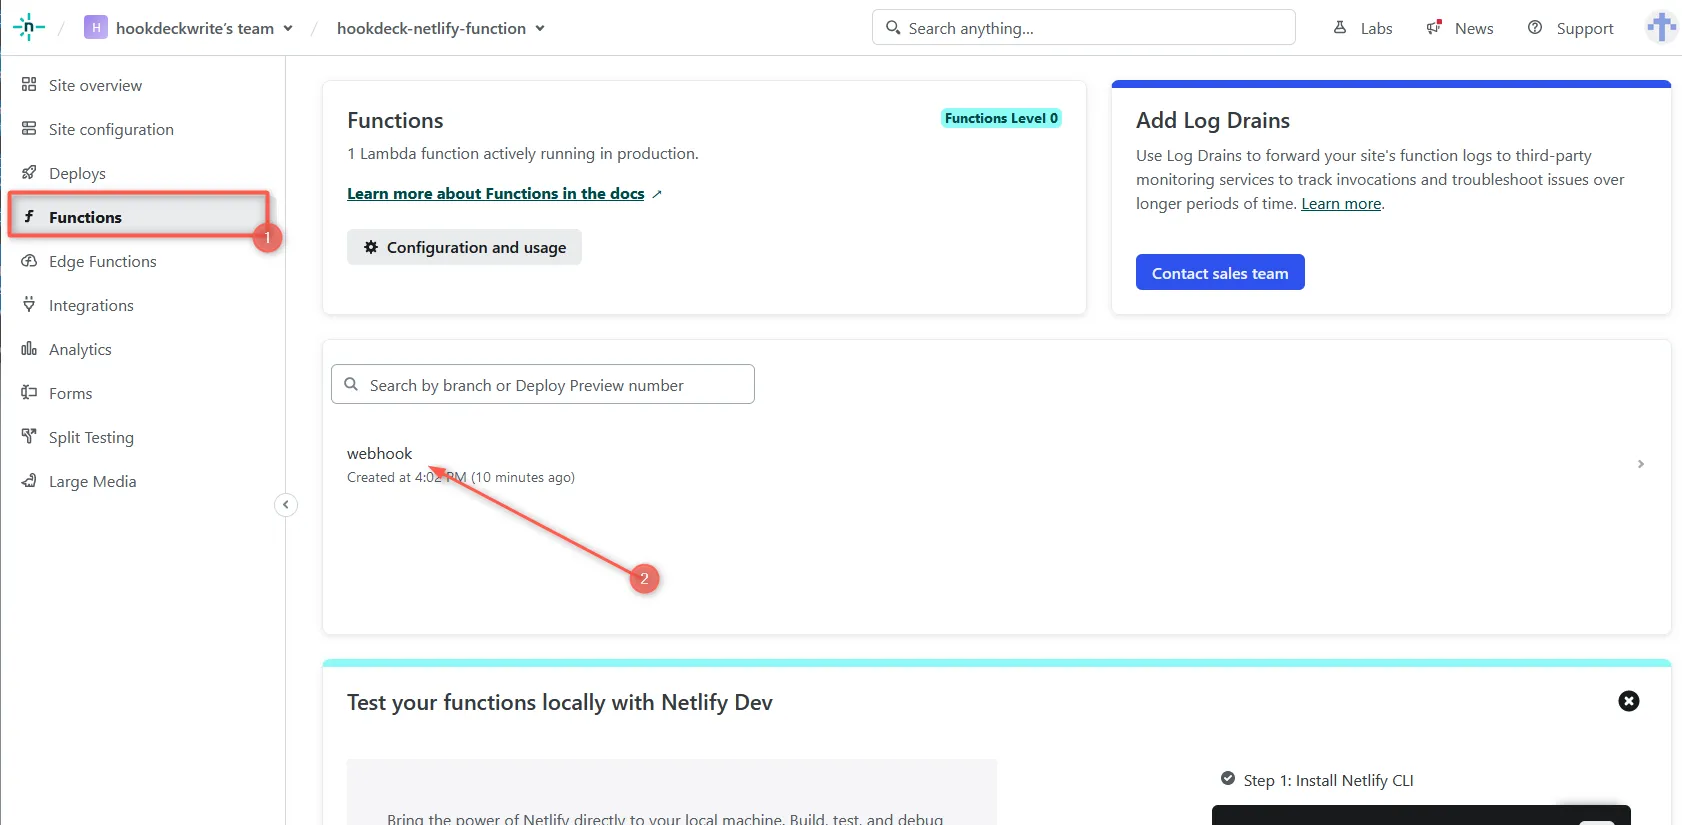
Read more about Netlify functions in the official documentation.
Replay webhooks
By using Hookdeck as a gateway between your source platform's webhooks and Netlify, you can replay any failed event that didn't make it to your Netlify function. To achieve this, follow the steps below.
Create a Hookdeck connection
- Sign up or log in to your Hookdeck dashboard.
- Click on Connections in the side panel, then Create + a new connection. This opens a right sidebar where you can fill in the required information and click Save.
- Source: Specify the source as any platform or application from which you want to receive webhooks.
- Destination: Create a destination pointing to the URL of your Netlify function that you deployed earlier, i.e.
https://<your-netlify-function-url.netlify.app>/.netlify/functions/webhook.
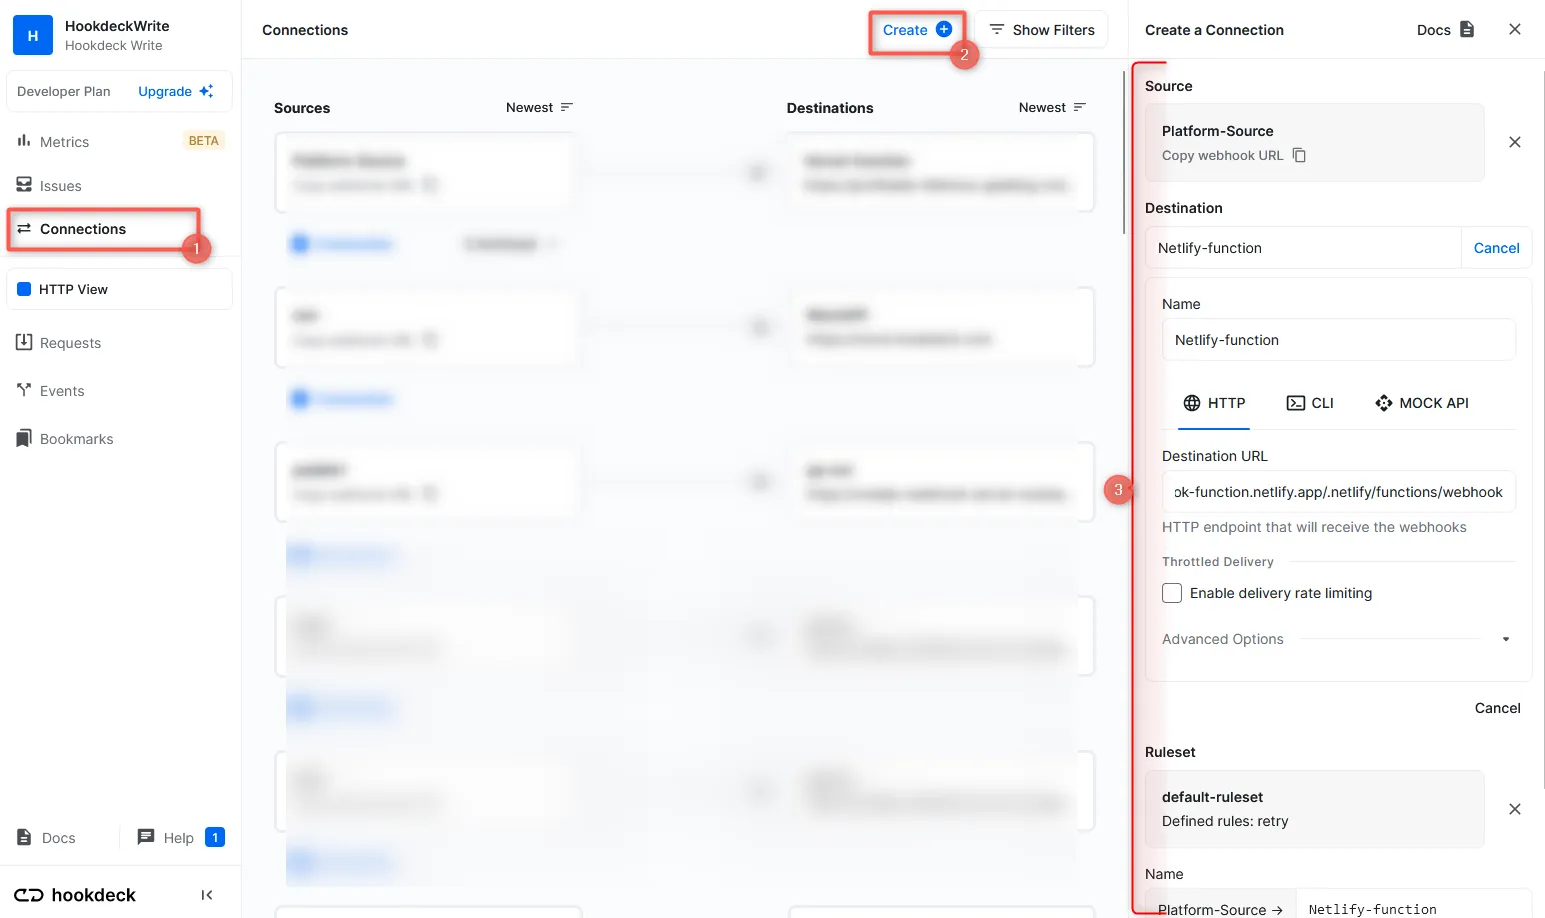
After creating the connection, Hookdeck provides you with a URL that you can use on the source platform to send webhook events.
The created connection enables webhook events from your source platform to be relayed directly to your Netlify function.
Receive webhook events
You can utilize the Hookdeck Console to simulate example webhooks from popular webhook sources.
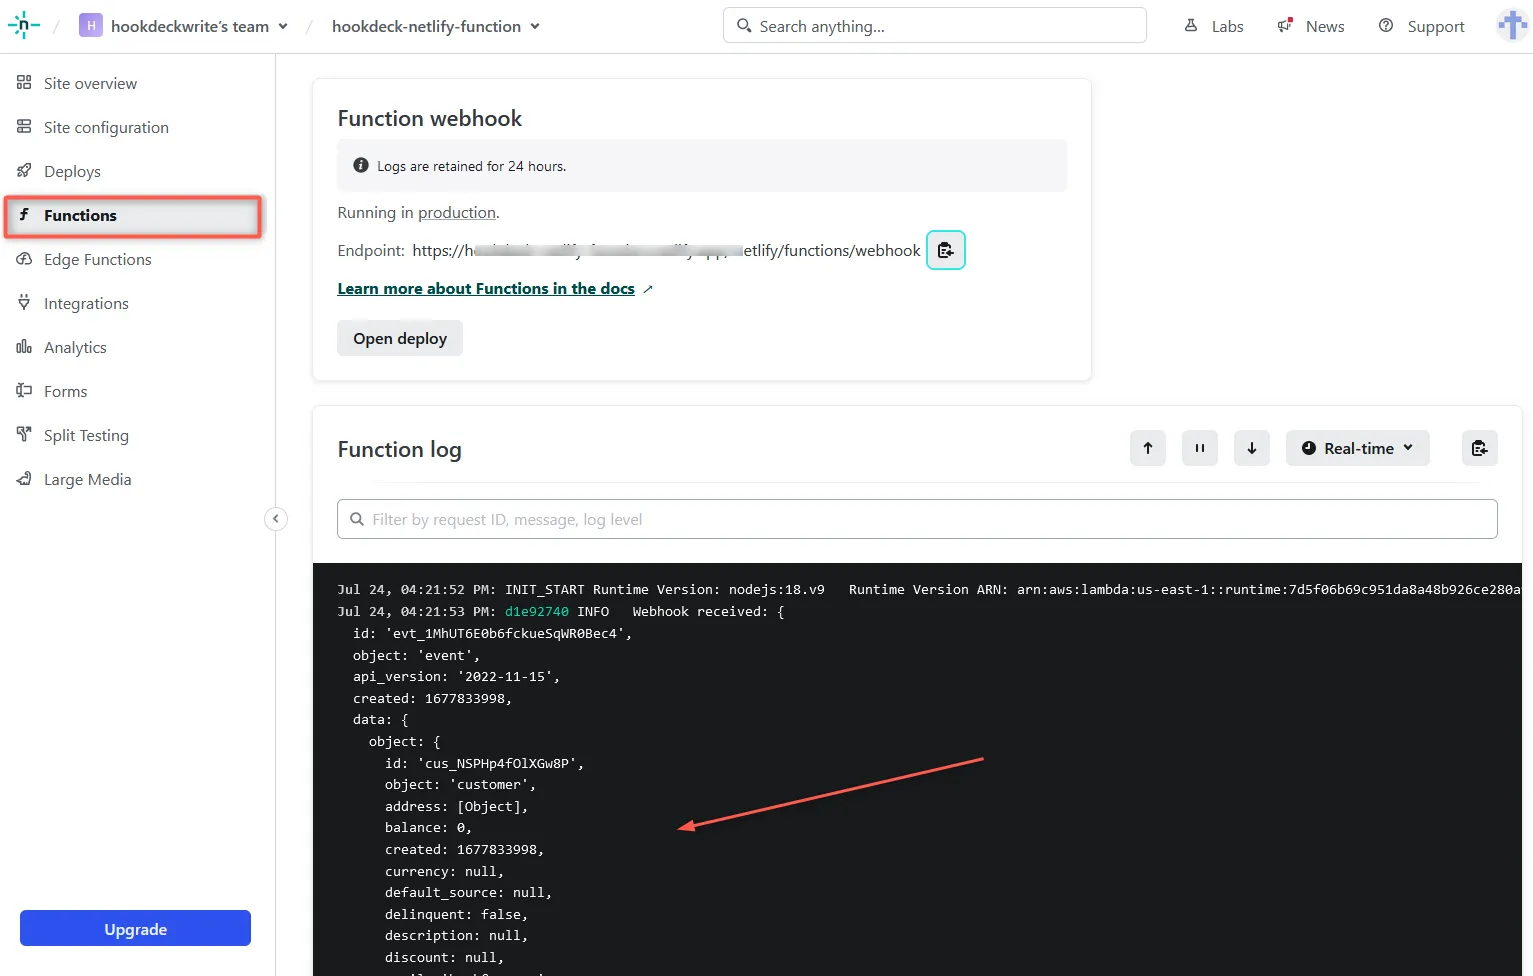
For example, if your webhook source is Stripe, when an event is triggered you can see it on the Hookdeck dashboard and also monitor it in the Netlify function logs.
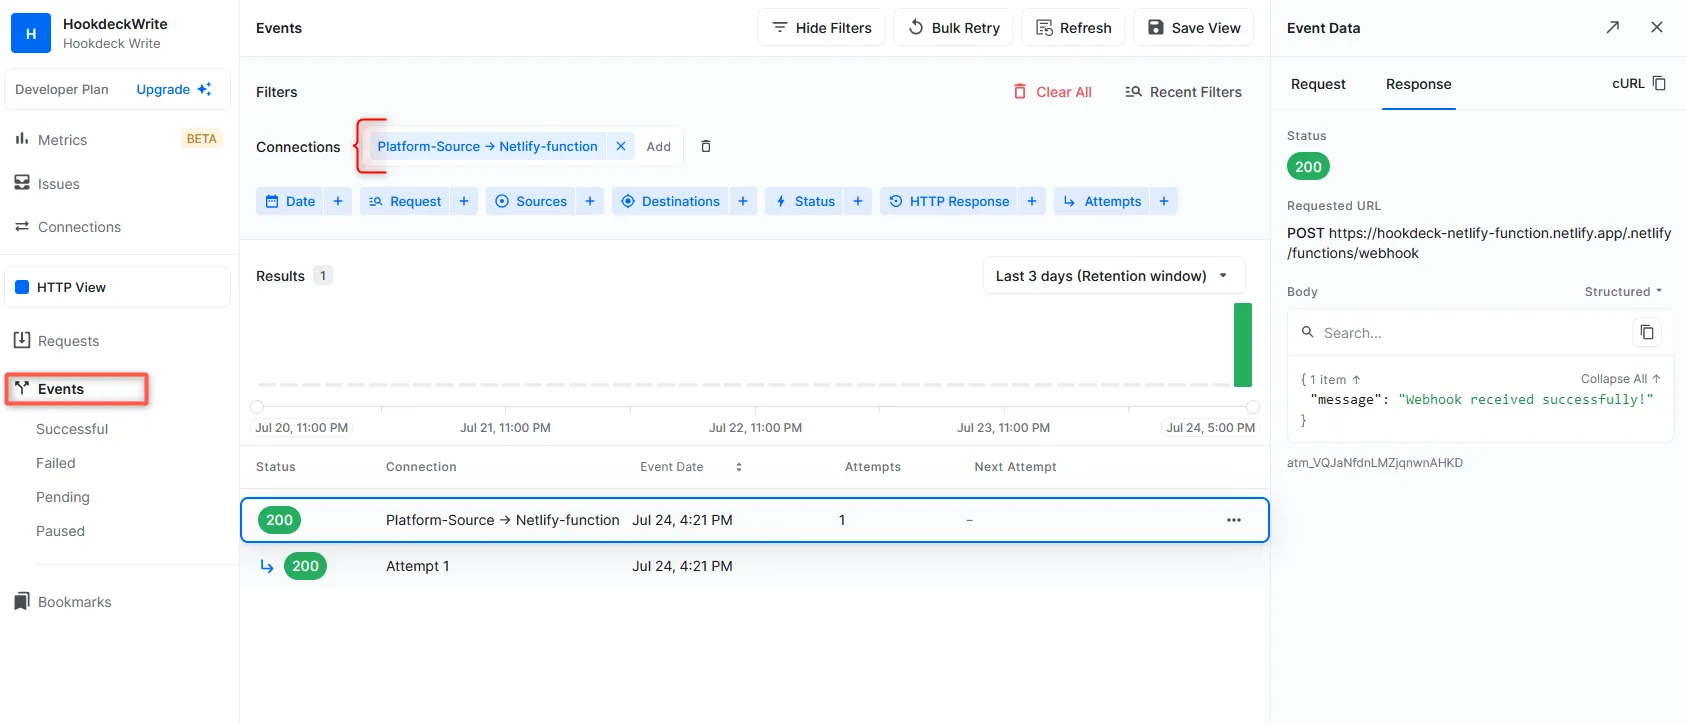
From your Hookdeck dashboard, switch to the Events tab in the side panel and filter as per the connection created above. This displays the activities of events on that connection.
From your Netlify dashboard, select the project where you deployed the function. Click on the Functions tab, and you should see your webhook function. To monitor the function logs, click and open the function.
Replaying error or failed webhooks
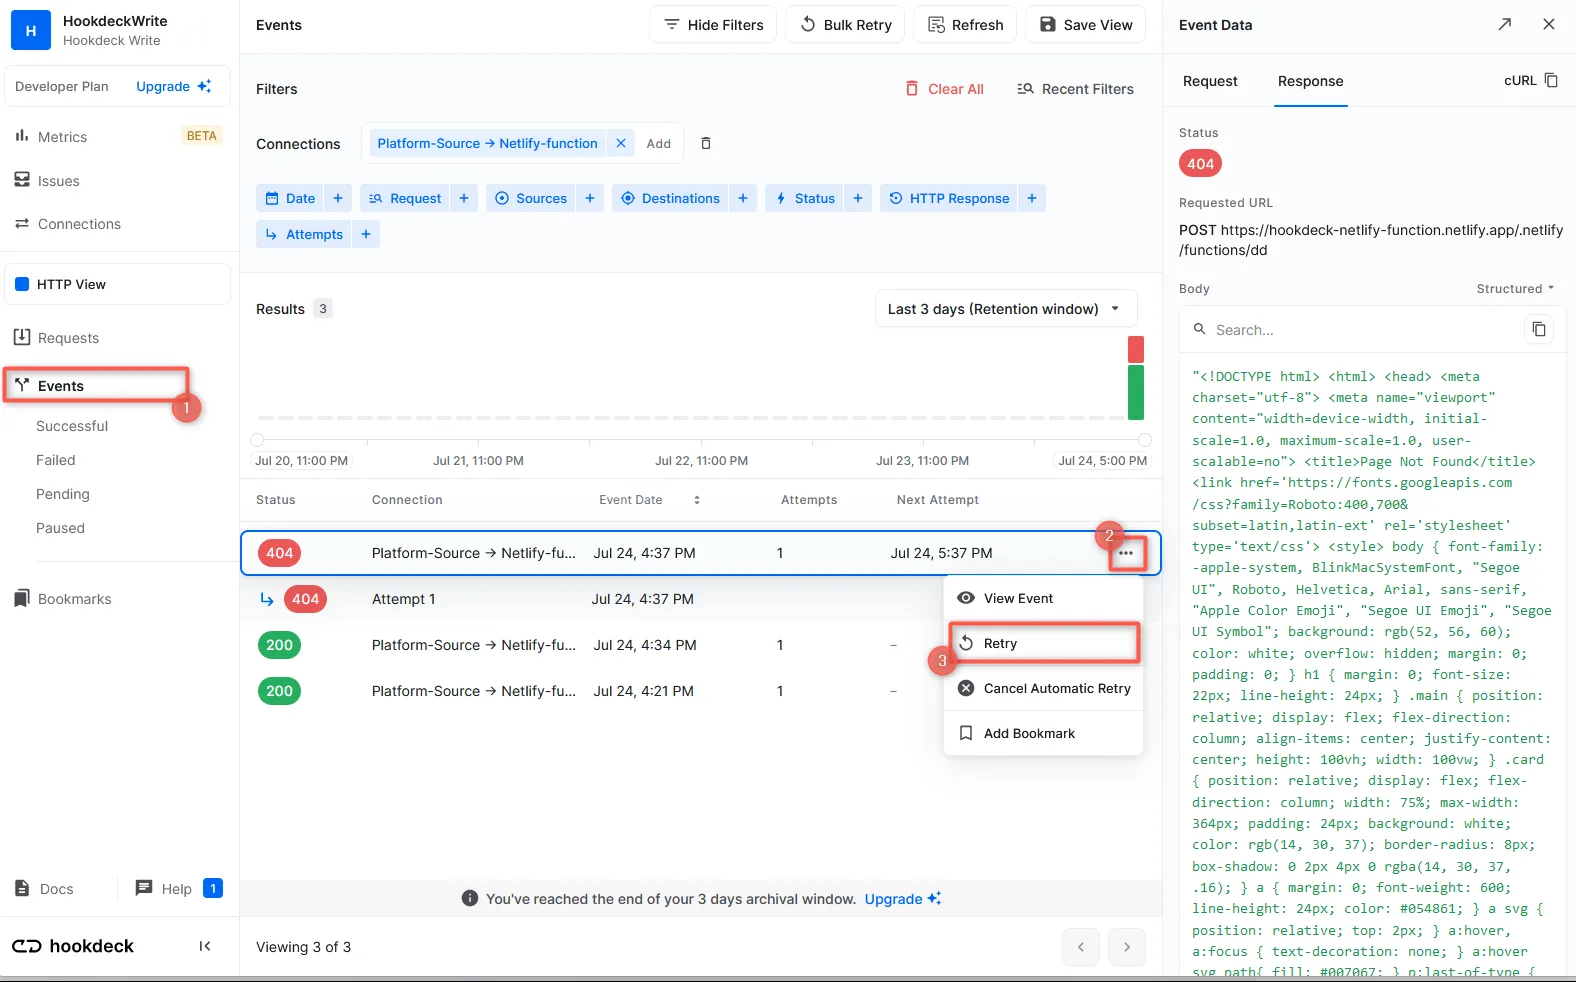
One of the valuable features provided by Hookdeck is the ability to replay webhooks. This comes in handy when you need to replay a failed webhook event in cases where the Netlify function didn't execute correctly.
To replay a failed webhook event:
- From the Hookdeck Event panel, locate the failed event, and click on the kebab menu (three vertical dots) across from it.
- Choose Retry from the menu. This will attempt to resend the event to your Netlify function, giving it another chance to process the event successfully.
Now you know how to receive and replay webhook events for your Netlify functions using Hookdeck. By leveraging Hookdeck's powerful features, such as security, routing, and analytics, you can effectively manage and troubleshoot webhook events from third-party platforms.
With Hookdeck and Netlify, you can build robust and reliable serverless applications that seamlessly integrate with external systems, ensuring smooth real-time communication and data transfer. Check out Hookdeck's documentation to explore more about its features and capabilities.