How to Receive and Replay External Webhooks in Zapier with Hookdeck
Webhooks are a vital component in automating workflows and connecting various applications. Zapier, a popular automation platform, allows you to create automated workflows, or "Zaps," by integrating different apps and services.
Zapier is a no-code automation platform that enables you to connect your favorite apps and services to automate tasks and workflows. With Zapier, you can set up triggers and actions to create seamless integrations between different applications, which saves time and reduces manual work.
Hookdeck is a webhook management platform that helps developers reliably receive webhooks, manage events and troubleshoot any issues quickly. By integrating Hookdeck with Zapier, you can streamline the management of incoming webhooks and ensure the reliability of your automated workflows.
In this guide, we will walk you through the process of receiving and replaying external webhooks in Zapier using Hookdeck.
Create a webhook receiver in Zapier
Before we dive into receiving and replaying webhooks with Hookdeck, let's create a Zap in Zapier that will serve as the endpoint for receiving webhooks.
Prerequisite: To be able to use the Zapier webhook trigger, you are required to have a paid Zapier plan.
Follow these steps to set it up:
Sign up or log in to your Zapier account.
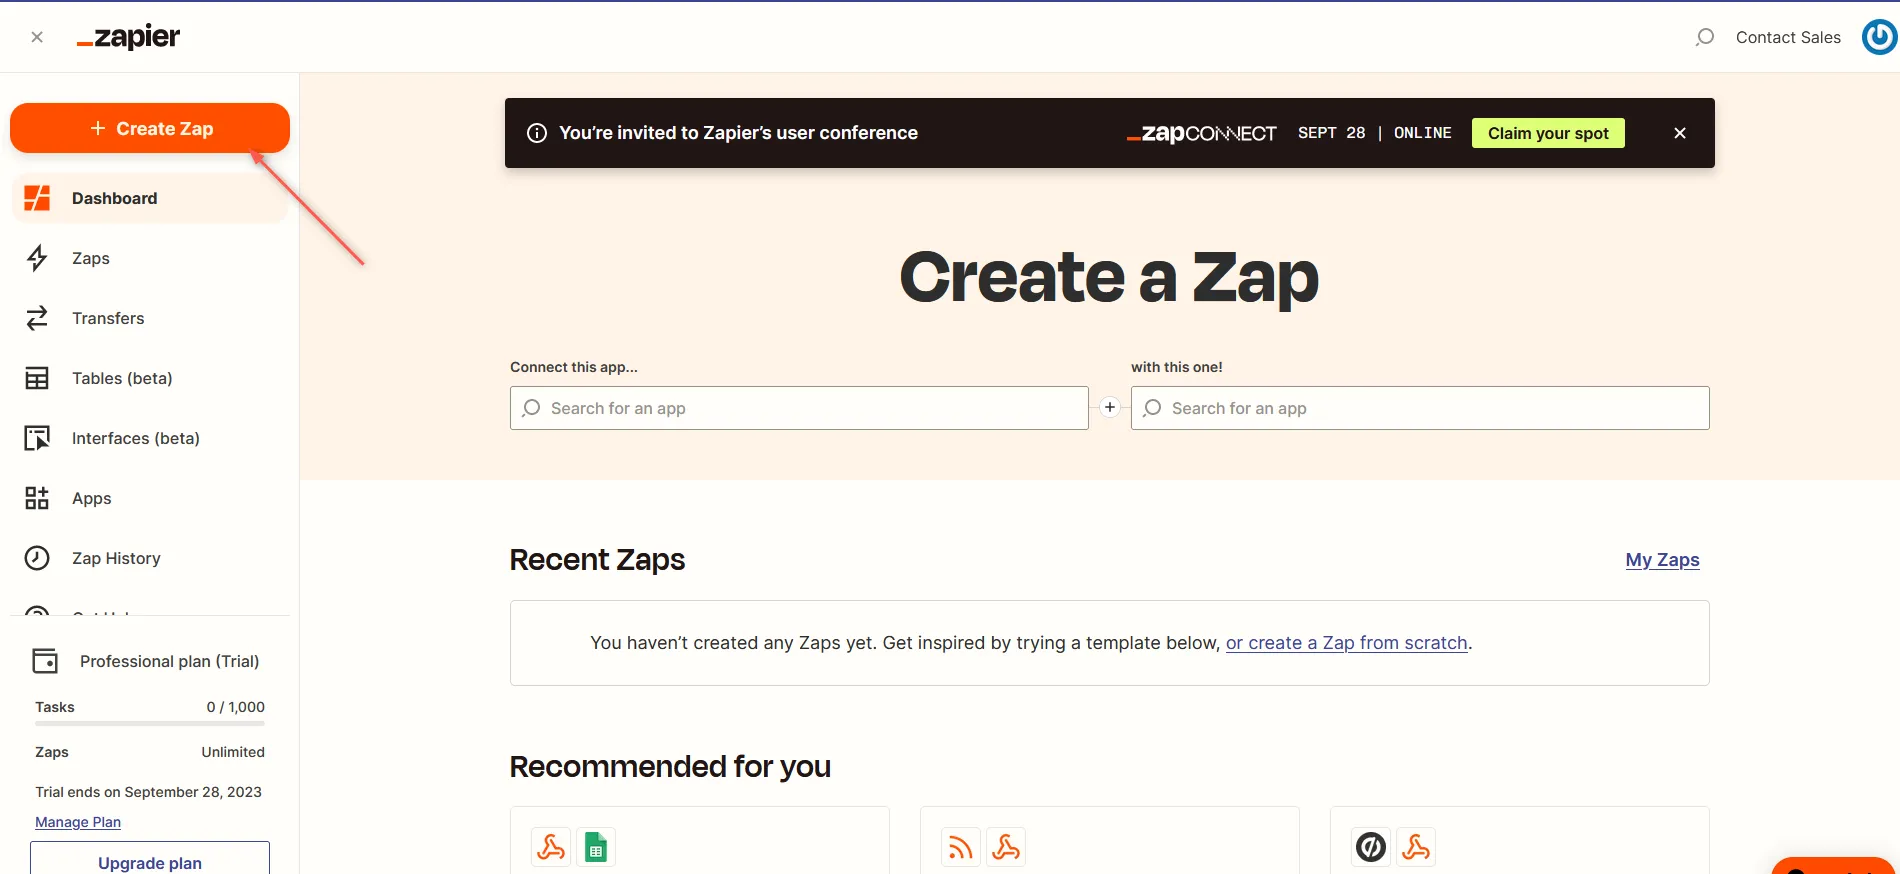
On your Zapier dashboard, click on + Create Zap in the top left to create a new Zap.
Click on the Trigger step in your Zap.
Search for and select Webhooks by Zapier as the trigger app.
From the Event dropdown menu, choose the type of webhook you want to set up. For most cases, the
Catch Hooktrigger is suitable. This trigger provides a unique URL to which you can send POST requests to trigger your Zap.
If you need access to the raw body of the response, consider using the Catch Raw Hook trigger.
Click Continue to proceed to the end.
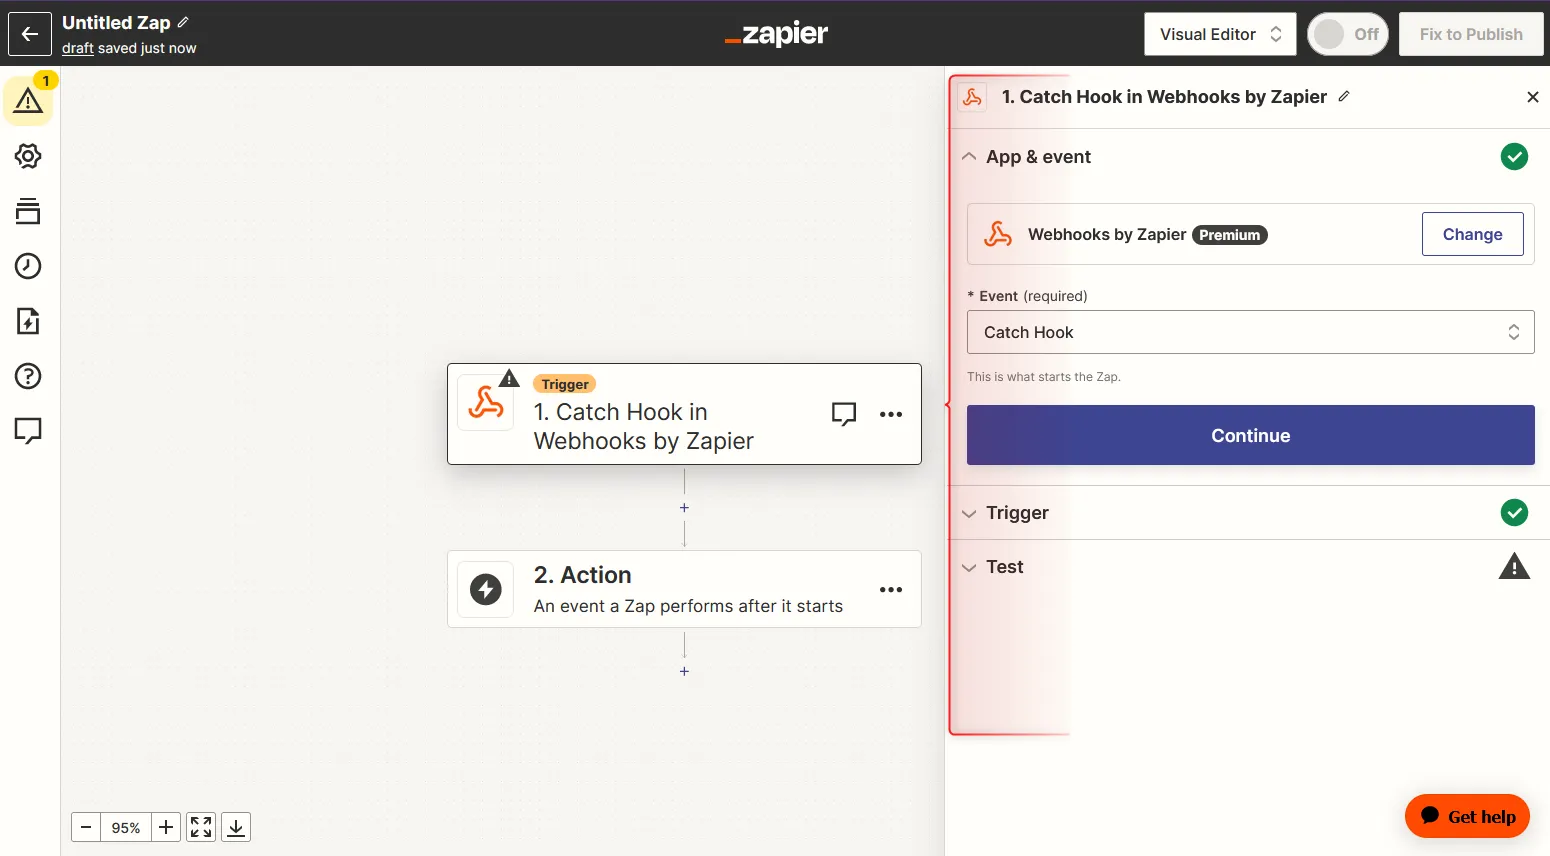
You are provided with a unique URL for your webhook trigger, which you must copy as it is needed below.
You can go ahead and select the app for the action; for this demonstration, we are going to receive the webhook payload.
Learn more about the Zapier webhook trigger here.
Integrate Hookdeck with Zapier
Now that you have a Zap set up to receive webhooks, let's integrate Hookdeck to enhance the reliability and management of webhook events.
Create a Hookdeck connection
Sign in to your Hookdeck dashboard.
On your Hookdeck dashboard, go to the Connections section and click on + Create Connection to create a new connection.
Configure the Connection and Save.
Source: Specify the source platform or application where the webhook is being sent from.
Destination: Enter the URL provided on your Zap.
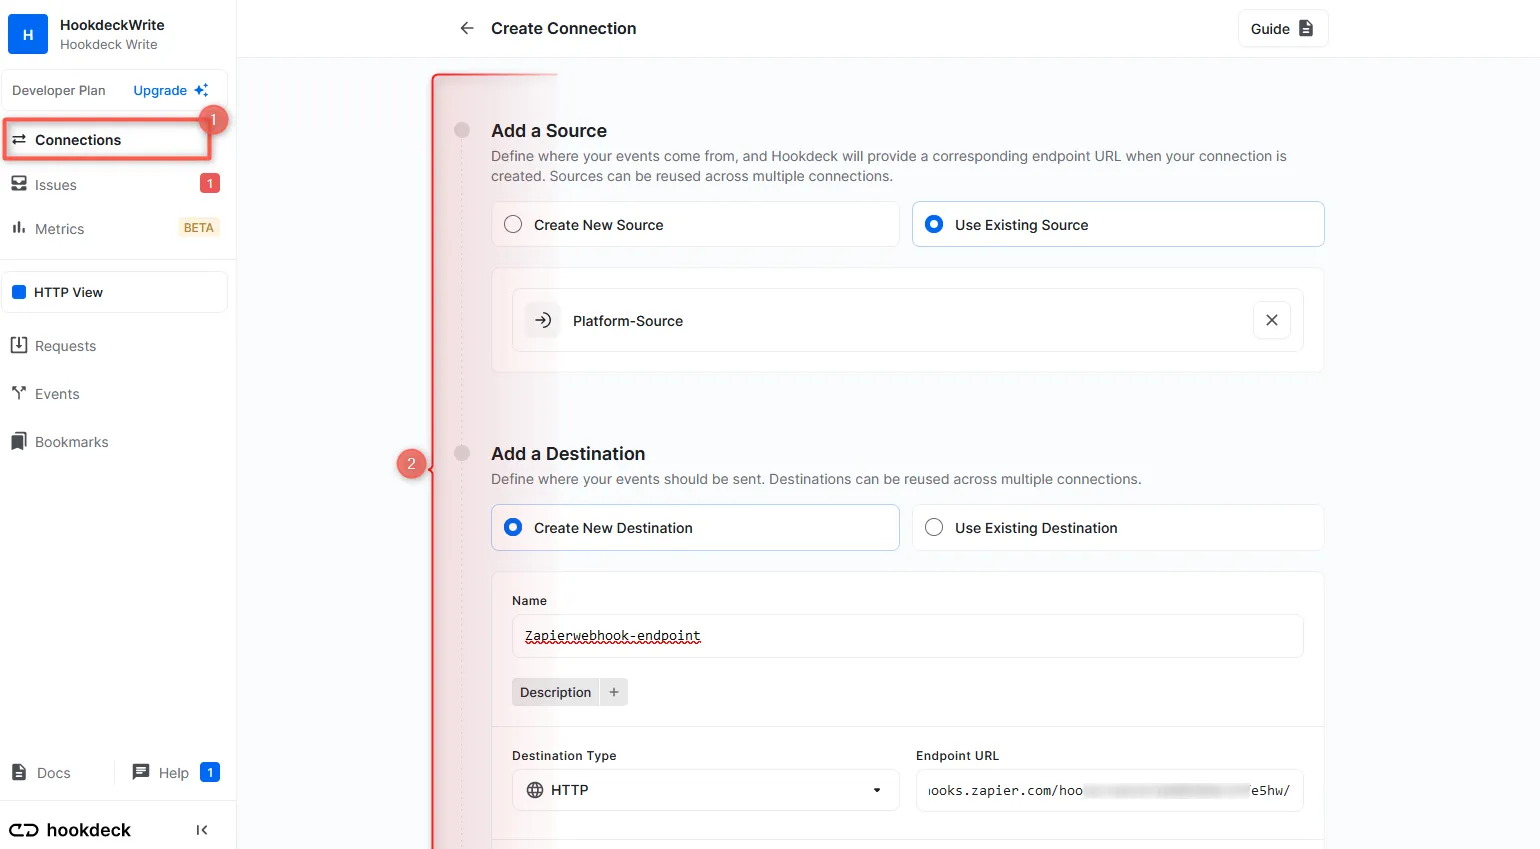
After creating the connection, copy the URL from Hookdeck to use on the source platform where the webhook is coming from.
Hookdeck now acts as an intermediary between the source platform and your Zap trigger, relaying the webhook events.
Receive and replay webhook events
You can use the Hookdeck Console to simulate example webhooks from popular webhook sources.
Imagine your webhook source is Stripe. When an event is triggered on Stripe (the source platform), Hookdeck receives the webhook event and forwards it to the Zap Trigger where any further action is executed with the data received.
You can monitor the events within the Hookdeck dashboard and track their delivery status, as well as in your Zap.
On your Hookdeck dashboard, navigate to the Events section. Filter the events based on the connection you created earlier. This will display the details of the webhook events received on that connection.
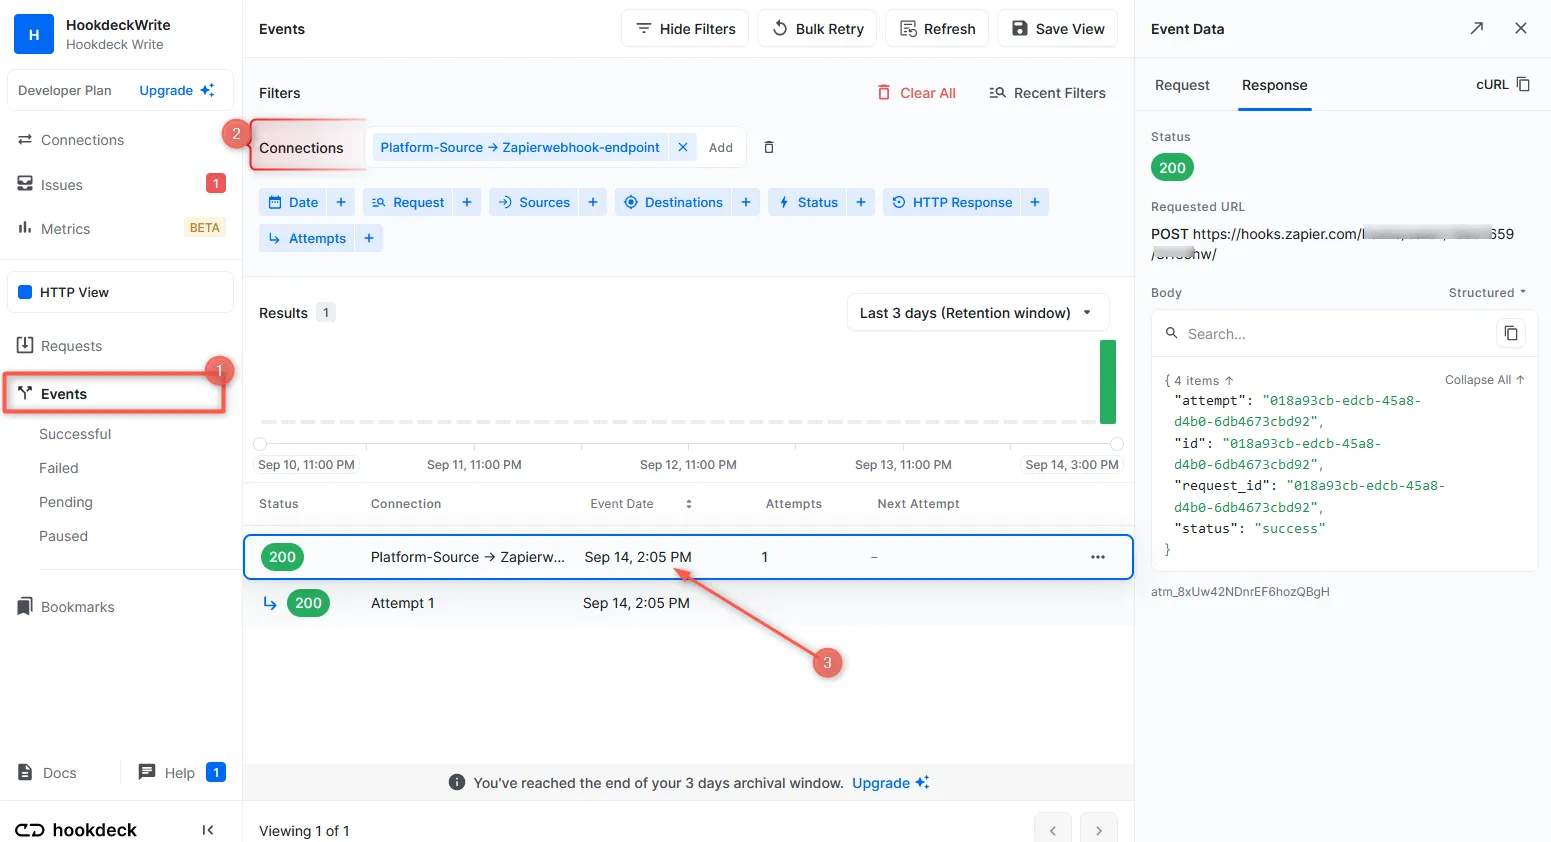
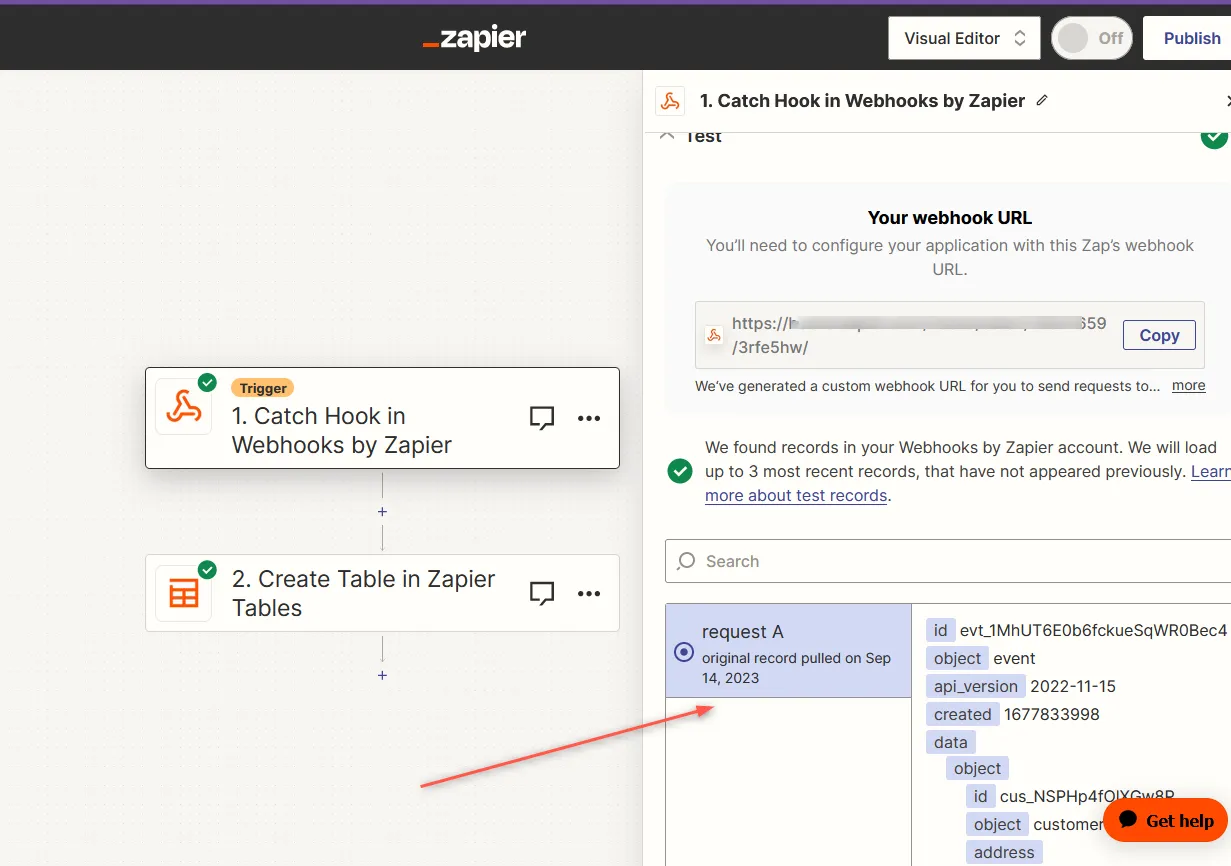
On your Zap Editor, you can see the payload received in the Test section of the Trigger. If the Zap is live, it can be seen in the Zap History.
Replay error or failed webhooks
One valuable feature Hookdeck provides is the ability to replay failed webhook events. This comes in handy when a webhook event fails to be processed correctly by your Zap.
To replay a failed webhook event using Hookdeck:
- In the Hookdeck Events panel, find the failed event you want to replay.
- Click on the kebab menu (three vertical dots) next to the failed event, and select the Retry option. Hookdeck resends the event to your Zap webhook Trigger, providing it with another opportunity to process the event successfully.
Conclusion
You've learned how to receive and replay external webhooks in Zapier with Hookdeck. By combining the Zapier Catch Hook event in the trigger with Hookdeck's webhook management features, you can streamline data integration and automate actions in response to incoming webhooks. This powerful combination enhances your workflow automation and data synchronization across various applications.
For further insights into Hookdeck's functionalities and best practices, explore the Hookdeck documentation.