How to Secure and Verify GitLab Webhooks with Hookdeck
Webhook security and verification are critical components in assuring the security and integrity of your data transmission. GitLab, a web-based Git repository manager, allows developers to receive webhook notifications when specified events occur, such as a push to a repository or a new release. However, if these webhooks are not adequately secured, they can be vulnerable to security threats such as fraud, replay attacks, man-in-the-middle attacks, and unauthorized access. Learn more about webhook security here.
As a developer, dealing with each platform’s webhook security implementation often leads to a lot of maintenance issues, especially having to add and manage new providers. Hookdeck removes this layer of complexity by letting you manage all of them using Integrations, and then you only have to implement Hookdeck’s signature verification on your server(s).
This article shows you how to set up and configure your GitLab webhooks manually and with Hookdeck. By the end of the article, you will have a comprehensive understanding of how Hookdeck can help secure your GitLab webhooks and protect your codebase and business from potential security threats.
How to manually secure GitLab webhooks
To manually secure your GitLab webhooks, you are required to follow these steps:
- Create a new webhook integration on GitLab with SSL enabled.
- Select the events to listen to and generate a secret token for the webhook.
- In your webhook receiver code, check for the presence of the
X-Gitlab-Tokenheader. - Compare the token value in the header to the secret token you generated in GitLab.
- If the tokens match, process the webhook. If they don't match, reject the webhook.
Learn more about securing GitLab webhooks here.
Verifying GitLab webhooks manually using the steps provided offers a secure solution for webhook validation. However, it also presents several challenges, like difficulties in securely managing and storing the secret token, complexity, and time wastage as far as implementation and maintenance.
How to secure and verify GitLab webhooks with Hookdeck
To secure and verify your GitLab webhooks with Hookdeck:
- From your Hookdeck dashboard, create a Hookdeck connection with GitLab as the source and your application as the destination.
- Create a GitLab webhook or select an existing webhook you wish to secure.
- Set the Secret token and enable SSL verification for the webhook, then Add webhook.
- From your Hookdeck dashboard, navigate to **Source Integrations** and select **GitLab** from the list of platforms.
- Fill in the Secret token as the secret received above and choose the GitLab source connection to secure.
You can select multiple sources and secure them at once.
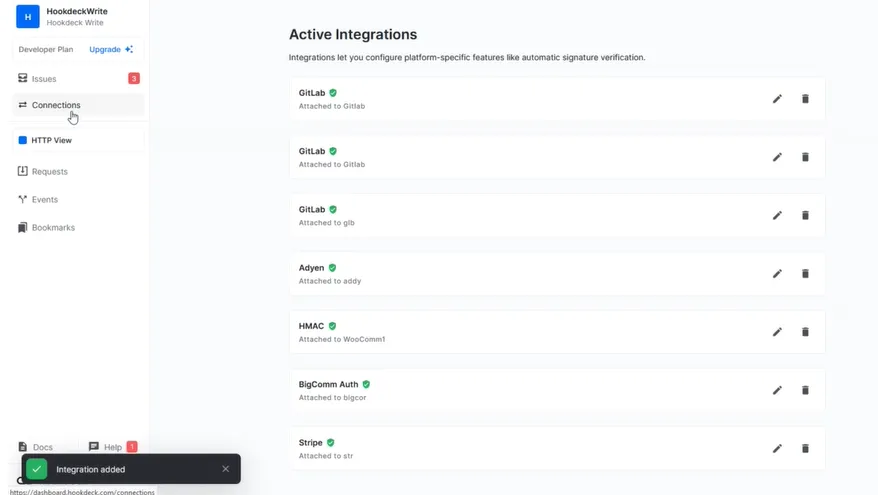
You now see the GitLab integration at the top of the integration page and the connection showing a green shield on the connection page.

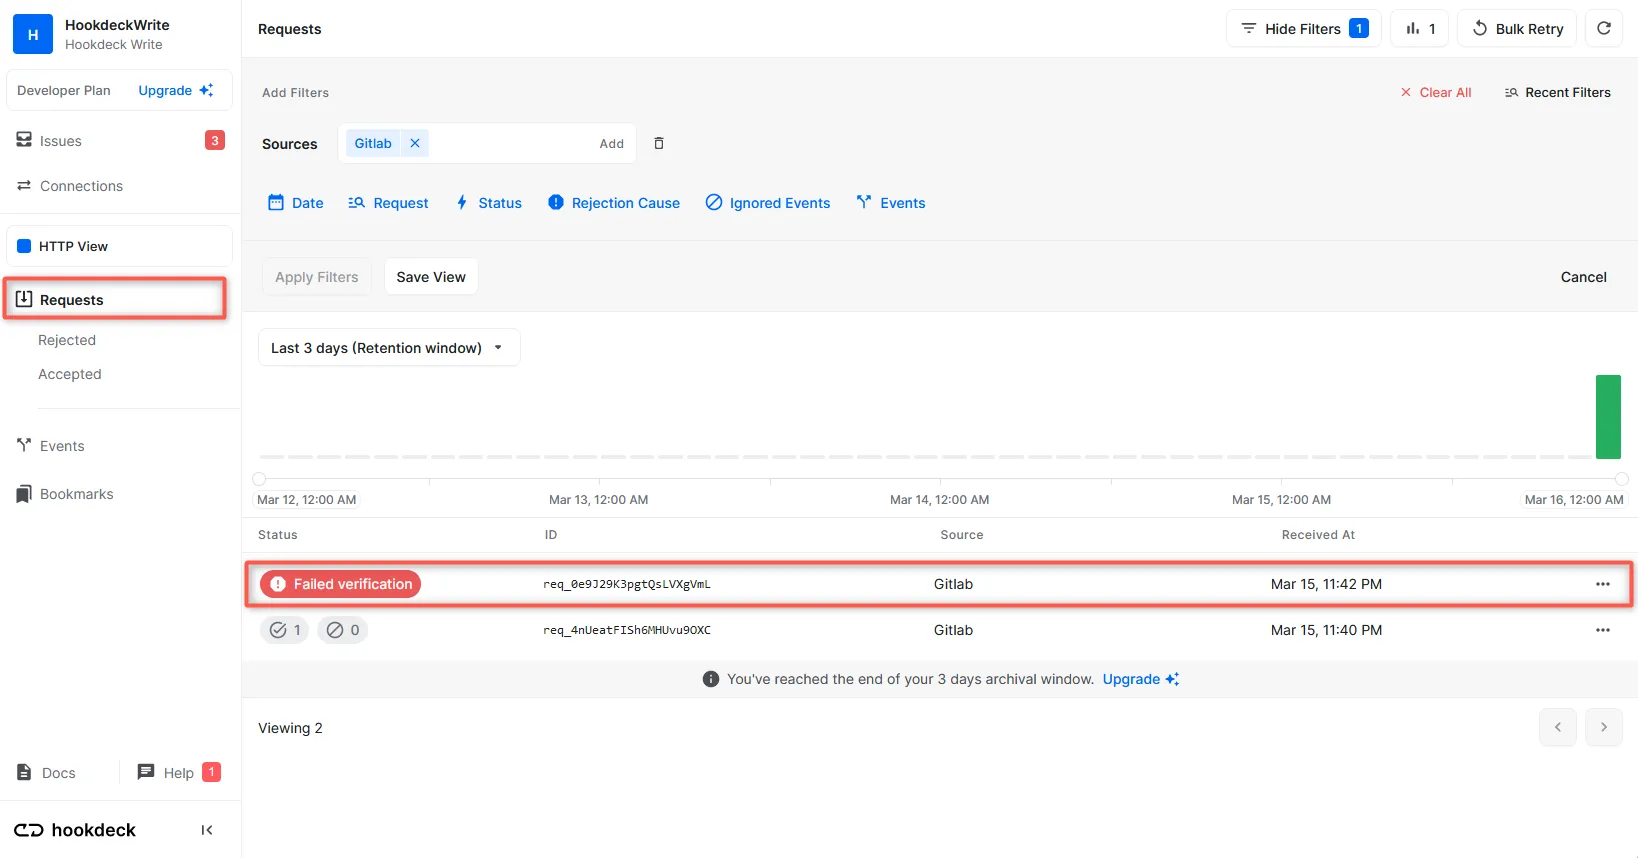
Legitimate requests from GitLab get received successfully with a 200 status code, while any request without the signature is flagged with Failed verification and doesn’t make it to your destination.

Hookdeck can be used to centralize your webhook security and verification, making it easy for you to only sign Hookdeck on your server. See the guide here.
Conclusion
In this article, we have seen why it is important to secure and verify GitLab webhooks, how manual verification can be complicated to handle, and the ease of implementation with Hookdeck.
In conclusion, using Hookdeck simplifies and streamlines the process of verifying GitLab webhooks, making it easier and more secure for developers to integrate quickly. By leveraging Hookdeck's automated verification process, you can be confident that you are accurately receiving and responding to GitLab webhook events without having to manually perform the time-consuming and complex steps involved in manual verification.