How to Test and Replay Stripe Webhooks Locally
Stripe provides a powerful suite of APIs and services to facilitate global payment. Its ease of use and payment gateway helps in processing a huge amount of transactions over the internet daily.
Using webhooks on Stripe gives you the ability to initiate an action in your application when an event happens on Stripe. Sometimes these triggers and events fail for reasons such as timeouts, overloading, or something just not working right.
Keeping an eye on every financial transaction’s success is vital to your business growth.
Hookdeck offers a simple infrastructure to monitor and replay your webhooks.
🟢 Relaying your Stripe webhooks through Hookdeck makes it easy for you to have a wider view and keep track of all the events that occur.
In this guide, we will learn how to connect a Stripe webhook through Hookdeck to an application running on localhost using the following steps:
- Set up a local webhook endpoint.
- Create a Hookdeck connection (free account).
- Create a Stripe webhook.
Then, we will test and retry the webhook event using Hookdeck.
1) Set up a local webhook endpoint
For this example, we are going to use the sample Node.js code from Hookdeck's repository. Feel free to follow up with any application or code you might have.
Open up your terminal and clone the repository by running:
git clone https://github.com/hookdeck/nodejs-webhook-server-example.git
Change into the cloned directory and install the dependencies.
cd nodejs-webhook-server-example
npm install
Start the server by executing:
node server.js
🟢 The node.js server starts up on
http://localhost:1337. See the list of endpoints in theroutes.jsfile.
We will make use of the /stripe-webhooks-endpoint.
2) Create a Hookdeck connection
There are several ways of creating a Hookdeck connection; see the guide [here].(https://hookdeck.com/docs/connections)
Create Hookdeck Connection with Hookdeck CLI
- Install the Hookdeck CLI.
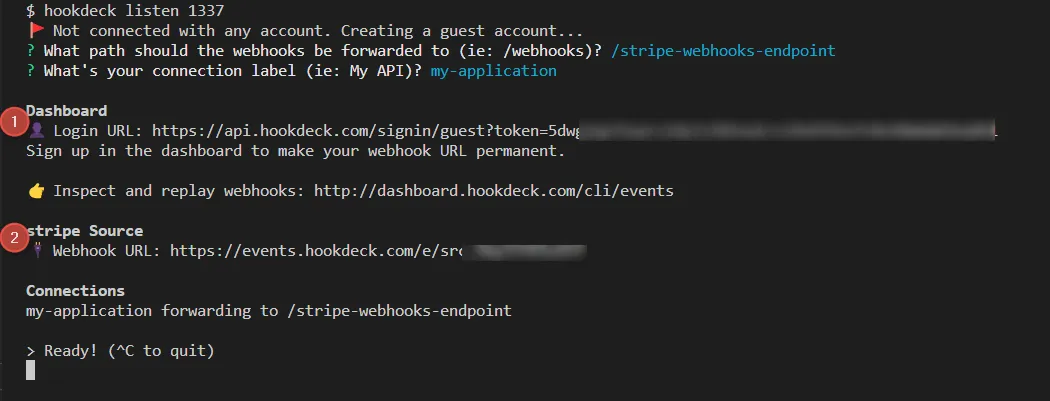
- Open up your terminal and expose the localhost port with:
hookdeck listen 1337
- The Hookdeck CLI initiates the creation of a guest account that will be used.
- You get prompted to do some basic setup:
- Create a new source (ex. stripe)
- Set the path to be forwarded to as
/stripe-webhooks-endpoint - Name the connection label (ex. my-application)
- The connection is created and you are given:
- A login URL to use for your Hookdeck dashboard
- The webhook URL needed
- The same connection can be seen on your Hookdeck online dashboard after following the link.
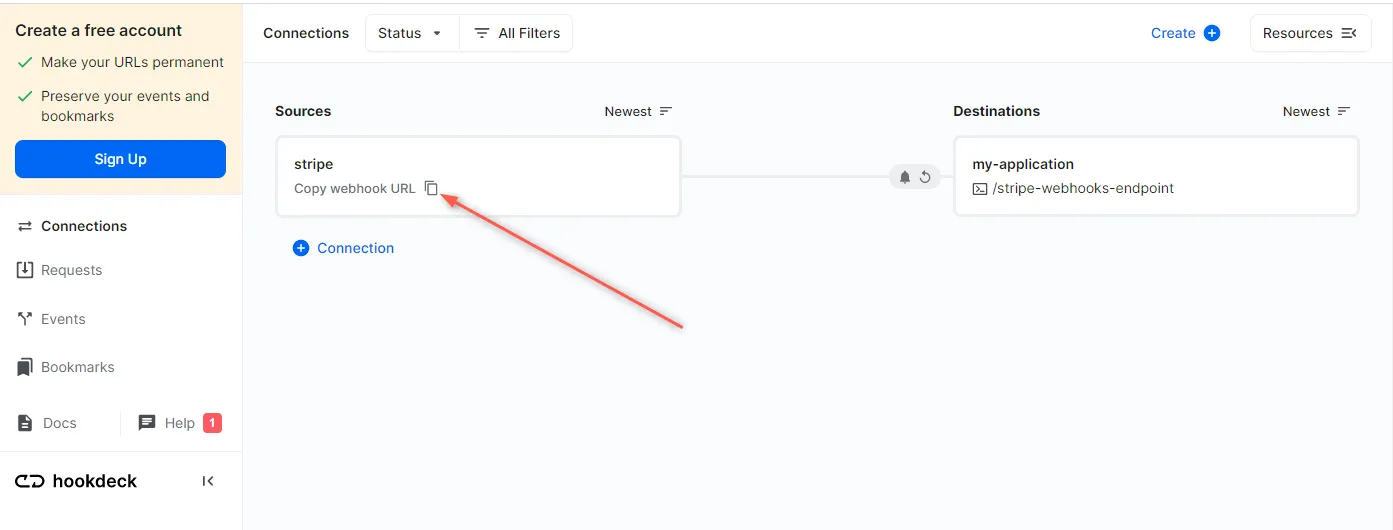
- Copy the Stripe Source webhook URL; it will be used later when creating the Stripe webhook.
3) Create a Stripe webhook
Sign up or log in to your Stripe dashboard.
Navigate to Developers > Webhooks and +Add endpoint.
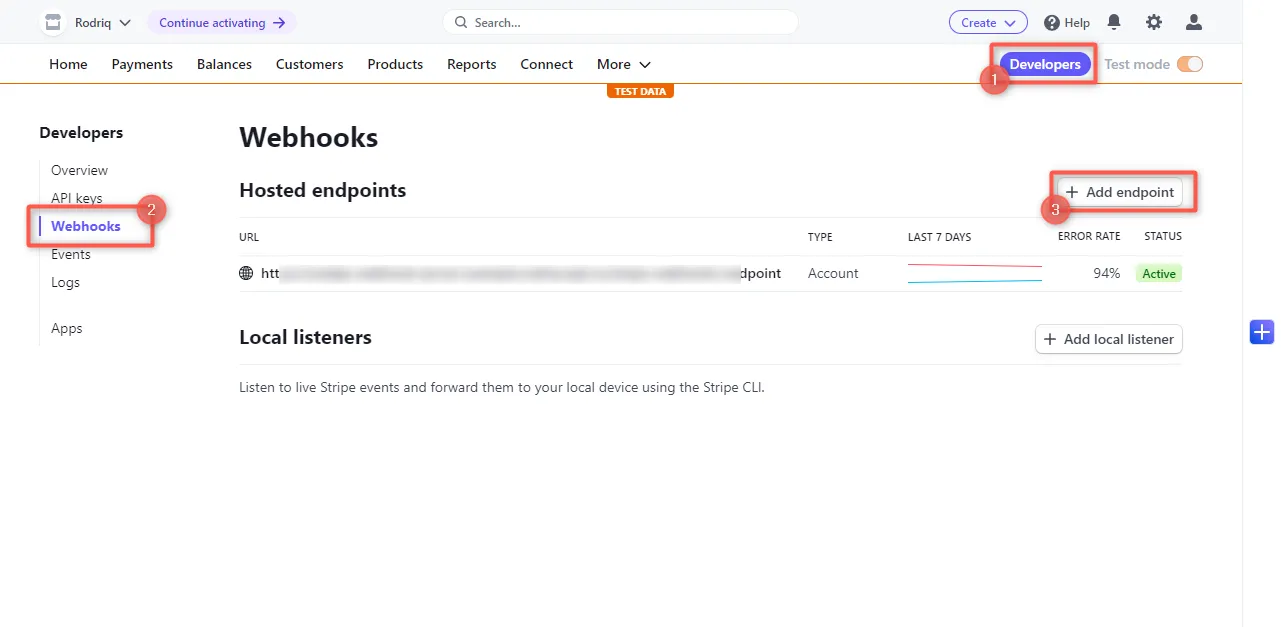
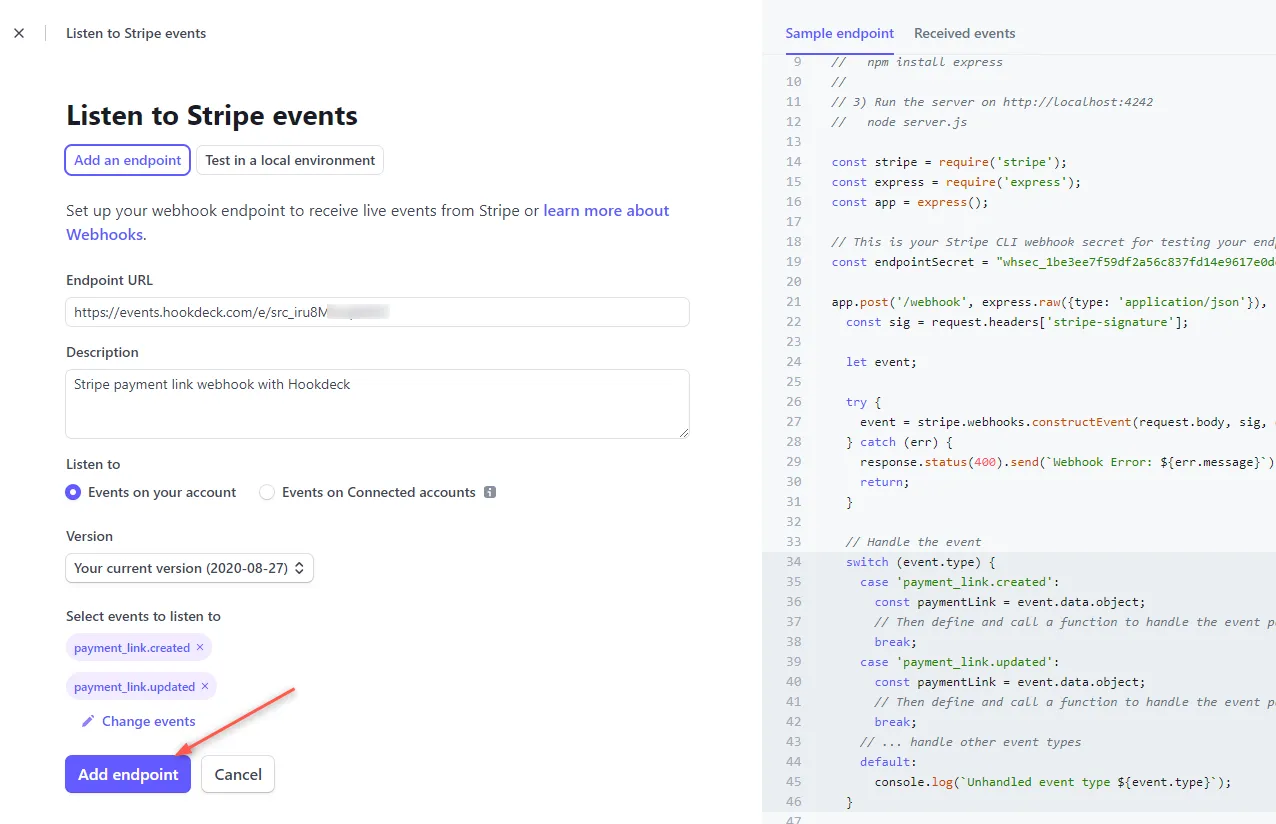
This will bring you to a page to fill in the details of your webhook.
- Endpoint URL: Paste the URL copied from the Hookdeck connection created above.
- Description: A simple description of your webhook endpoint.
- Select events to listen to: Here you choose the list of events you want to listen to. For this demo, select Payment Link (
payment_link.create,payment_link.updated).
Add endpoint.
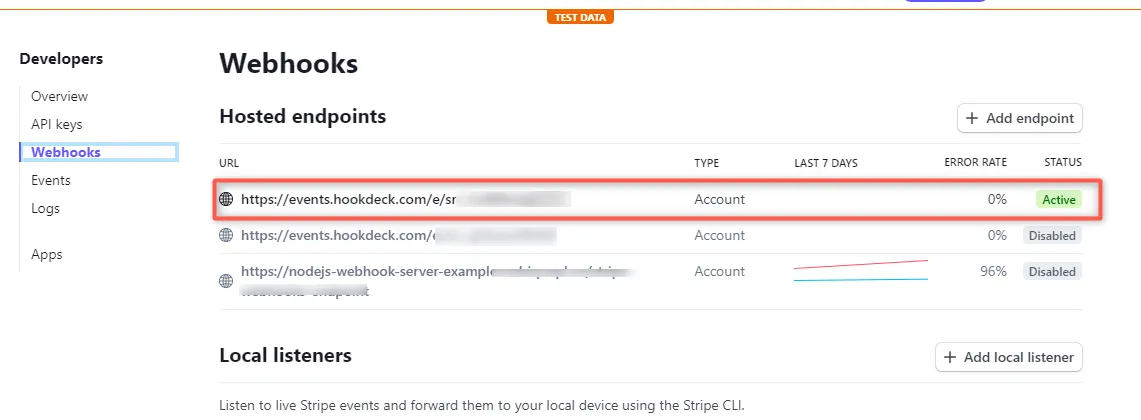
After creating the endpoint, it appears on the list of webhooks with an active status:
Testing Stripe webhook with Hookdeck
After setting up our local server, configuring the webhooks, and creating a Hookdeck connection to link them, it is time for us to test and see how all this plays together.
On your Stripe dashboard, click on the Create dropdown at the top right and select Payment link.

Create or select any product you have and Create link.
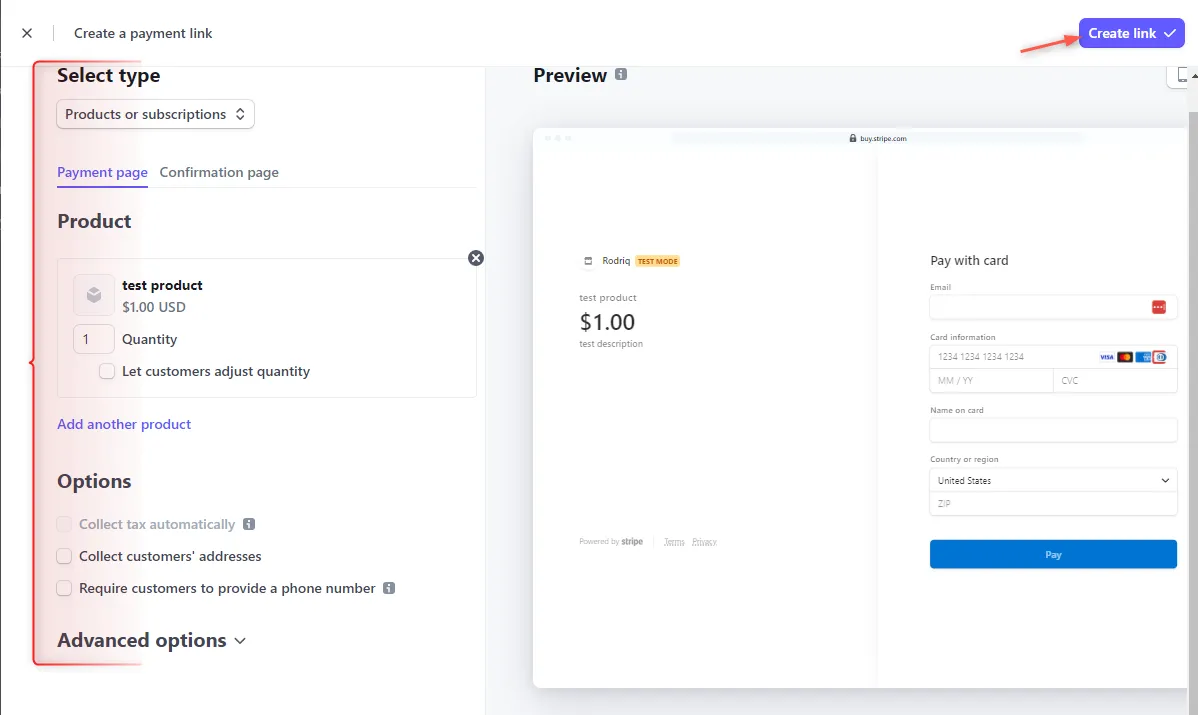
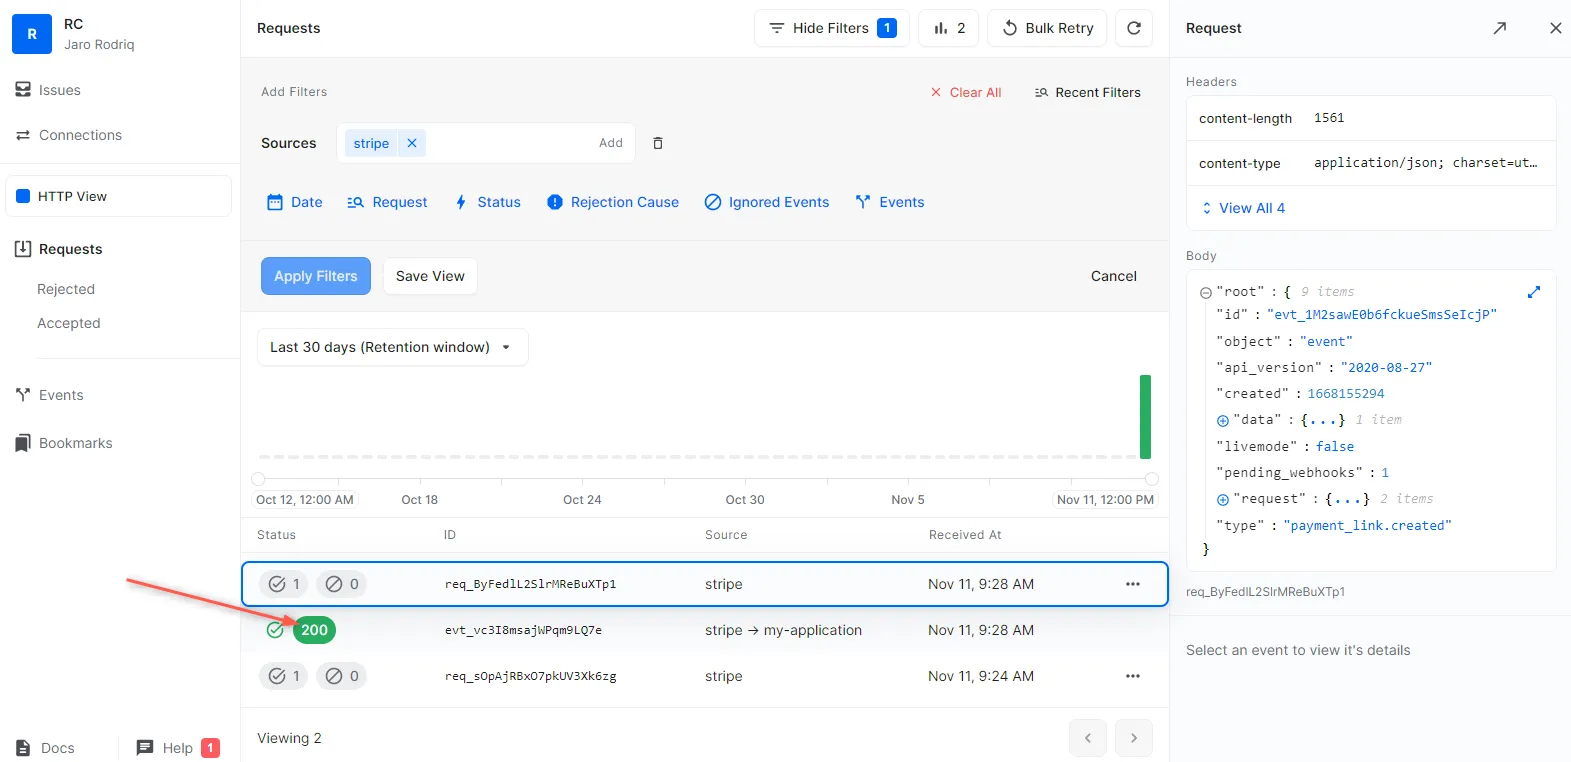
After creating, the payment_link.create event is triggered which is then relayed by Hookdeck directly to your application.
On your Hookdeck Request dashboard, you should see a success request with 200 status code:
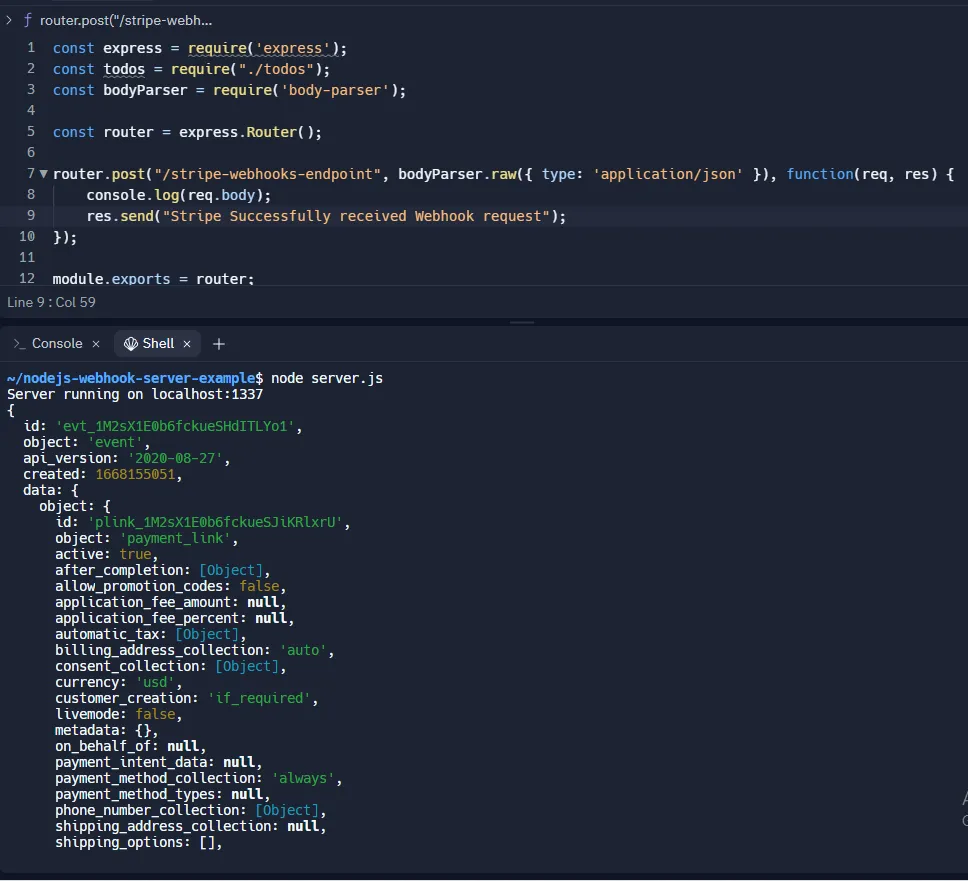
Back on the terminal of the localhost project, the payload is printed like below:
Retrying error or failed events
In case there are any failed events that don’t make it to your destination, Hookdeck provides you with the ability to retry and attempt to deliver any failed or error event.
To retry a failed event:
- Navigate to the Events tab on the sidebar of your connection; and
- Click on the Kebab menu by the right of the failed event, and then Retry.
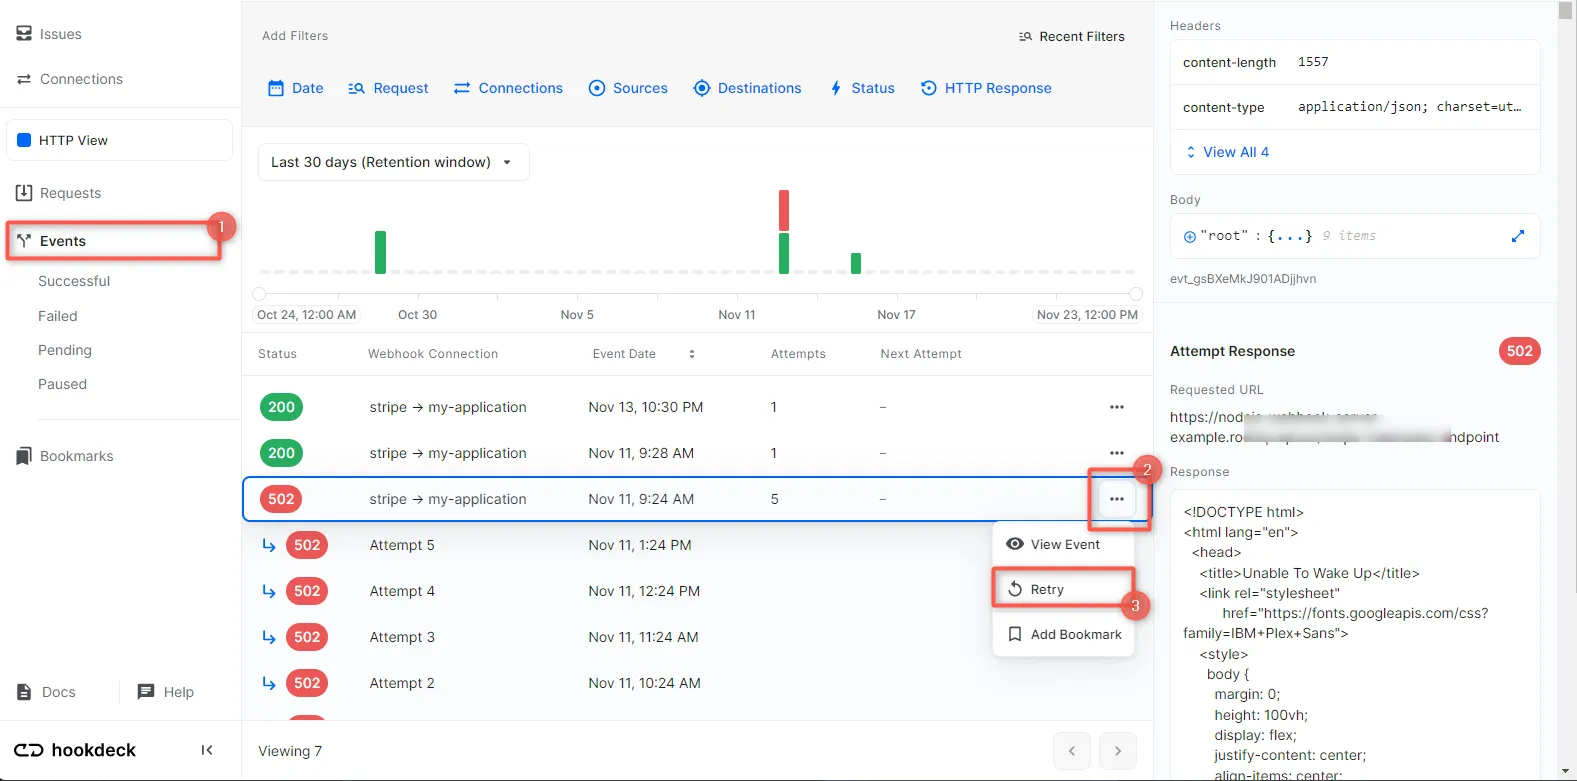
See more details on managing Hookdeck events here.
In this tutorial, you learned how to receive Stripe webhook events through Hookdeck (a webhook infrastructure for reliable ingestion) to an application running on localhost.
Hookdeck can be used safely to consume, monitor, and troubleshoot your Stripe webhooks.